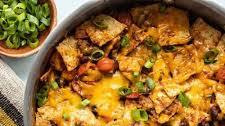
Crunchy Taco Skillet

  • 1 pound ground beef One packet taco seasoning, or your own homemade taco seasoning
  • 1/2 cup salsa Verde
  • 2 cups chicken broth or chicken bone broth is my preference
  • 1 cup white rice
  • 1 cup shredded cheese – I have skipped this and it’s perfectly delicious

Cook your ground beef. Add in taco seasoning and your salsa Verde. Throw in your chicken broth and rice.

Cover and let simmer for another 12 to 15 minutes and serve with sour cream or my favorite Greek yogurt as a side. Crunchy, whole-grain tortilla chips, fresh avocado, cilantro, black olives, or some homemade pico or any other taco toppings you like. If you’re The Chad ketchup. 😳🤔

We’ve all been there. It’s midweek, you’re juggling work, family, and a dozen other responsibilities, and the last thing you want to do is spend an hour in the kitchen cooking a healthy meal. That’s when the drive-thru or delivery apps start to look like the quickest (and most tempting) solution. But what if I told you there’s a way to make eating well a lot easier, even when life is crazy busy?

Enter: Batch cooking your proteins.

The Power of Batch Cooking

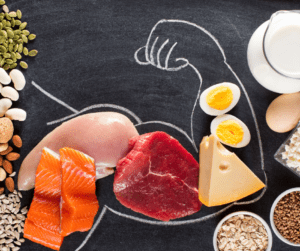
Batch cooking is essentially prepping a large quantity of a food item at once so that you have it ready to go for meals throughout the week. When it comes to proteins—whether it’s chicken, beef, tofu, or beans—batch cooking can be a game-changer for your nutrition. Here’s why:

  1. Saves Time and Energy
    • Imagine this: You cook a large batch of chicken breasts or ground turkey on Sunday, and now you have enough protein ready for several meals. This not only saves you time during the week but also spares you the mental energy of deciding what to cook each day. With your protein already prepped, putting together a healthy meal becomes as easy as reheating and adding some veggies or grains.
  2. Prevents Poor Food Choices
    • When you’re tired and hungry, it’s easy to reach for something quick and unhealthy. But if you’ve got a batch of cooked proteins waiting for you in the fridge, you’re more likely to throw together a balanced meal instead. A bowl of reheated protein with a side of pre-washed greens or microwaved veggies is faster—and healthier—than waiting for delivery.
  3. Portion Control Made Easy
    • Batch cooking also allows you to portion out your proteins in advance, making it easier to stick to your nutritional goals. Whether you’re aiming to increase your protein intake or just maintain a balanced diet, having pre-portioned servings helps you stay on track without having to measure and weigh every time you eat.
  4. Versatility in Meals
    • One of the best things about batch-cooked proteins is their versatility. That batch of grilled chicken you made? It can be turned into salads, wraps, stir-fries, or even added to soups. Having a base protein ready gives you the flexibility to mix up your meals without spending extra time in the kitchen.

How to Get Started

Getting started with batch cooking is easier than you might think. Here’s a simple plan to try out:

  1. Pick Your Protein: Choose one or two proteins you enjoy and that can be used in various dishes. Chicken, ground beef, tofu, or beans are great options.
  2. Cook in Bulk: Prepare your chosen protein in a way that’s versatile. Grilling, baking, or sautéing are all good options. You can even season half one way and the other half differently to keep things interesting.
  3. Portion and Store: Once cooked, divide the protein into portions that work for your meals. Store them in airtight containers in the fridge or freezer, depending on how soon you plan to use them.
  4. Plan Your Meals: With your protein ready, think about what veggies, grains, or other sides you can quickly pair with them. Prepping these in advance can further cut down on your cooking time.

Conclusion

Life gets busy, and it’s easy to let nutrition fall by the wayside. But with a little planning and batch cooking, you can set yourself up for success. Prepping your proteins in advance is like giving yourself a head start on the week. It makes healthy eating more convenient, less stressful, and ultimately, more sustainable.

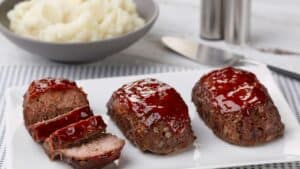
Ina Gartin’s Mini Meat Loaves

Ingredients

Instructions

  1. Preheat the oven to 350 degrees F. Heat the olive oil in a medium saute pan. Add the onions, thyme, salt, and pepper and cook over medium-low heat, stirring occasionally, for 8 to 10 minutes, until the onions are translucent but not brown. Off the heat, add the Worcestershire sauce, chicken stock, and tomato paste. Allow to cool slightly.
  2. In a large bowl, combine the ground chuck, onion mixture, bread crumbs, and eggs, and mix lightly with a fork. Don’t mash or the meatloaf will be dense. This is Key!!! Do NOT over mix it.
  3. Divide the mixture into 6 (10 to 11-ounce) portions and shape each portion into a small loaf on a sheet pan. Spread about a tablespoon of ketchup on the top of each portion. Bake for 40 to 45 minutes, until the internal temperature is 155 to 160 degrees F and the meat loaves are cooked through. Serve hot.

They will have a “fat pool” around them on the parchment paper. Just scrape that off and throw it away and serve warm with garlic mashed potatoes and the roasted Roma tomato recipe linked her

Enjoy friend. This is one of our favorites.


Ok, so each of these has a place I am just being a little saucy here!

We always want the new sexy fun thing but really the basics are what we really need!


Stay Fit Mom KFC Bowls
Makes 5 bowls / per bowl:
439 cals / 36.2p / 38.4c / 15.5f

For the chicken:
20 ounces boneless skinless chicken breast
1/2 cup Panko bread crumbs (42g)
2 tablespoons flour
1 teaspoon salt
1 teaspoon oregano
1 teaspoon paprika
1 teaspoon garlic powder
1/2 teaspoon pepper
1/2 teaspoon thyme
1/2 teaspoon celery salt
1/2 teaspoon ground mustard
1/2 teaspoon ginger
1/4 cup egg whites (60g)

For the potatoes:
25 ounces red potatoes
1 & 1/2 tablespoons butter
2 tablespoons fat free milk (I use Fairlife)
1/4 teaspoon garlic powder
salt to taste
pepper to taste

For the gravy:
2 tablespoons butter
2 tablespoons all purpose flour
1 & 1/2 cups beef broth

For the bowls:
5 tablespoons corn (frozen or strained from can)
2 & 1/2 ounces cheddar cheese


1. Dice chicken breast into bite size pieces. Place in a ziplock bag or large bowl. Pour the egg whites over the chicken and coat well.
2. In a mixing bowl combine the Panko, flour, and seasonings. Pour into the bag with the chicken and shake up well, coating all pieces. Arrange in the air fryer in one layer with no pieces touching. Cook at 400 degrees for 9 minutes in batches if necessary. If you don’t have an air fryer, cook in a pan over medium high heat until no longer pink.
3. Boil potatoes in salted water until soft when poked with a fork (about 30-40 minutes). Strain out water and return to the pot.
4. Mash the potatoes and mix in the milk, butter, garlic powder, salt and pepper. Evenly distribute into 5 bowls.
5. Top each bowl with 1/5 of the chicken bites, 1 tablespoon of corn, and 1/2 an ounce of cheese.
6. In a saucepan over medium heat, melt the butter. Whisk in the flour (It will be clumpy). Slowly whisk in the broth, about 1/4 cup at a time. Stir continuously until well combined and thick.
7. Pour evenly over all 5 bowls or pack separately. Store meals in the fridge until ready to eat.
8. When ready to eat, air fry the whole bowl for 10 minutes at 350 degrees or microwave for about 3 minutes.


Link to Video:

https://www.instagram.com/reel/CtXSZ13gUz9/?utm_source=ig_web_copy_link&igshid=MzRlODBiNWFlZA==
 

INGREDIENTS

For the Salad (serves 1)

  • 1-2 cups Red butter lettuce, or favorite mixed greens (100- 150 g)
  • 1/2-1 Tbsp Good balsamic vinegar (15 g, I use a fruit infused from Baker and Olive)
  • Salt and pepper to taste
  • 1/2 cup Grilled chicken, chopped (100 g)
  • 1/4 cup Cherry tomatoes, halved (30 g)
  • 1/4 cup Blueberries (30 g)
  • 2 Tbsp Green onions, chopped (10 g)
  • 2 tsp Feta cheese (I used a dairy-free) (10 g)
  • 2 tsp Toasted almonds, chopped (7 g)
  • 2 Tbsp Dairy-free herb pesto (30 g) recipe below
  • Fresh basil

Dairy-free Herb Pesto (serves 12)

  • 1 cup Cilantro (40 g)
  • 1 cup Parsley (30 g)
  • 1-2 cups Fresh basil (30 g)
  • 2/3 cup Dairy-free plain yogurt* (150 g)
  • 6 Tbsp White balsamic vinegar** (90 g)
  • 1/2 cup Toasted almonds (60 g)
  • 3 cloves Fresh garlic, or frozen cubes
  • Pinch of red pepper flakes
  • Pinch of Kosher salt and pepper


INSTRUCTIONS

  • Make your dressing by adding all ingredients to a small blender or food processor and blend until pretty smooth. The nuts will leave it a little chunky– that’s good! But blend until it’s your preferred consistency.
  • Add salad greens to a large bowl and toss with vinegar and a pinch of salt and pepper. Top with chopped grilled chicken, cherry tomatoes, blueberries, green onions, feta, and toasted almonds.
  • Finish with a drizzle of herb pesto and some fresh basil. Toss and enjoy!

NOTES

This salad is perfect when you want something extra light, but meal-quality rather than snack-quality! If you want to bulk it up a bit, EASY! Enjoy more chicken for added protein, or toss in your favorite grain for some carbs. I LOVE some brown rice or farro tossed in. Or of course, enjoy it with a nice hunk of crusty bread, or some salted and pan-heated pita bread.

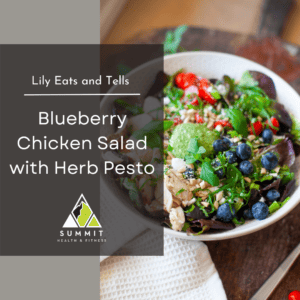
MFP: Lillie Eats and Tells Blueberry Chicken Salad with Herb Pesto

NUTRITION

Serving: 1salad
Fiber: 2.8g
Calories: 297kcal
Fat: 10g
Protein: 31g
Carbohydrates: 15g


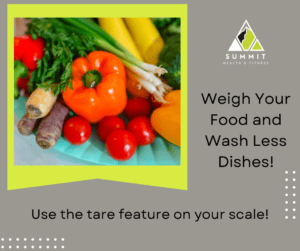
When we first start weighting and measuring it can be a little overwhelming.

Keeping it simple and using the tear feature can be so helpful!

Make the most out of your prep time with these simple tips!


I batch cook almost all my proteins.  We love chicken but my favorite is chicken thighs.  If I want a leaner option while still having the added flavor of the thighs.  I’ll cook 2 thighs to every chicken breast. Shred, chop and combine them after grilling or cooking and there you have it!  Flavorful delicious chicken that is a little easier on the macros with all the great flavor and richness!

An easy way to prep chicken is using an instapot, even frozen chicken will shred nicely after a short amount of time in an instapot. the “set it and forget it” aspect is so helpful with busy lives. No need to babysit it. Cook the chicken, dice or shred and portion it for whatever recipes you want to use later on in the week. Make midweek meals simple.

Prepping your proteins ahead of time is a great way to help make meal planning simple and easy. Combining this with last weeks “make a plan” tip will assist you greatly in alleviating the stress of the “whats for dinner?” question. Plan a week or a few days ahead and prep your proteins accordingly. Shredded Chicken tacos on Monday could easily become Enchilada Soup on Tuesday if you prepped your shredded chicken on Sunday Night!


Start your day strong with these Grab and Go breakfast Ideas:

Pre-made breakfast Burritos

Baked Oatmeal

Chia Protein Pudding

Yogurt & fruit or granola

Protein pancakes or waffles

Overnight oats

Egg Bake

Egg white bites

Protein Muffins

Banana Bread